3.28. Security

|
The Security option lets you configure permissions for your DataHub user accounts as well as for MQTT, OPC Classic, OPC UA, tunnel/mirror, TCP, and DDE connections. For more information and how-to instructions for DataHub security, please see Using Security. |
![[Important]](images/important_2051192373.png) | |
The DataHub security model in version 11 is entirely different from previous
versions, and uses a different database file. Instead of
When you run v11 for the first time the DataHub engine creates the new security database file with default entries, and migrates the security data (i.e., users and permissions) from any previously installed version, including special OPC UA security rules. To carry over permissions from your previous version, the DataHub engine
replicates each set in an identically named role with the string
" If you revert from v11 back to v10 the v10 security database file remains unchanged, and you will find your settings to be as they were the last time V10 was used. |
Overview
When configuring security you act as an administrator, restricting access and allowing only authorized connections to the data and functionality of a DataHub instance. Security is administered through several constructs:
User - An identity provided to programs or devices authorizing them to connect to the DataHub instance.
Principal - A login context for a specific user. It consists of two parts:
Connection source (IP pattern)
Connection protocol (Interface, e.g., TCP, OPC, MQTT)
Role - A collection of permissions for DataHub data and functionality.
Permission - A means of controlling and regulating access to specific DataHub application- and data-level functions.
These security constructs are owned by one of two organizations:
The Internal Organization is defined and managed by the DataHub instance. It is standard and cannot be changed or edited by the administrator, but its constructs are available for use while configuring users, principals and roles that belong to the Local organization.
The Local Organization is configured and maintained by the administrator. Think of it as ‘your’ organization.
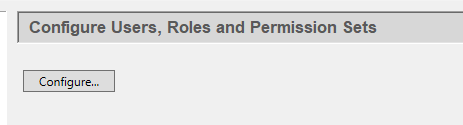
Click the button to open the Configure Security window.
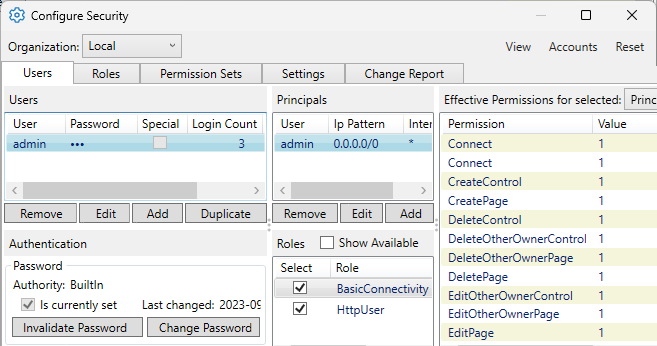
For Organization, use when configuring your own users and custom roles and permissions sets. Choose the organization when you need to change the permissions for anonymous connections. See Remote Connections in the Using Security chapter for more details. The , , and menus are described below.
The Users tab is the main work area. You will be doing most of your security configuration here—defining local users and principals, and associating those principals with pre-defined Internal roles. The Roles and Permission Sets tabs are used if you need to customize the defaults. The Settings tab is for changing the interface settings. The Change Report tab shows what changes you have made before clicking or to apply them.
Users tab - User
The , , , or buttons allow you to create, edit or delete users. As you edit any item in the Security interface, uncommitted changes are displayed in red and listed on the Change Report. These changes are applied when you click or .
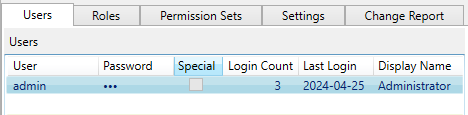
offers three options for user type:
A BuiltIn user is managed and authenticated by the DataHub instance. That is, when a user attempts to log in, the user name and password credentials are passed to the DataHub instance to validate. As such, each BuiltIn user requires a distinct user name and a valid password.
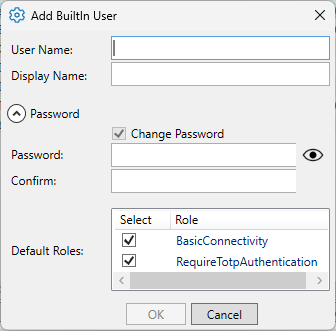
Each user has a required User name and an optional Display Name for convenience.
Similar dialogs are provided as needed to edit a user name or change a password.
A Windows Local Machine User is authenticated by the machine running the DataHub instance. The user entry is maintained as a proxy. This enables data and functional permissions to be assigned to the user, while relying upon authentication to be handled by Windows.
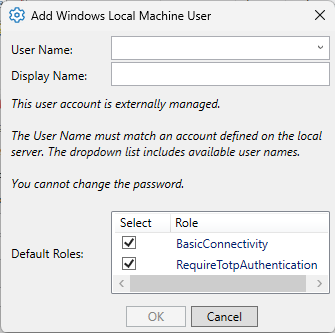
You can choose one of the available Windows users from the drop-down list. Each such Windows account can be selected only once.
You can also create proxy user accounts that are managed and authenticated by an external LDAP server, using the Import Accounts dialog.
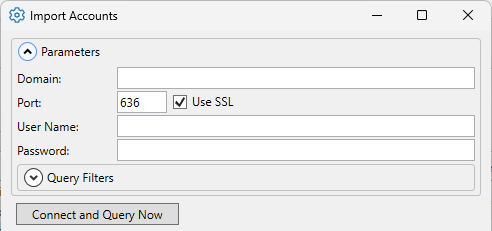
Enter the Parameters information as needed. You can get the Domain and Port information from your network security administrator. Use your LDAP user name and password credential to connect to the LDAP server. Pressing the button populates the Account List.
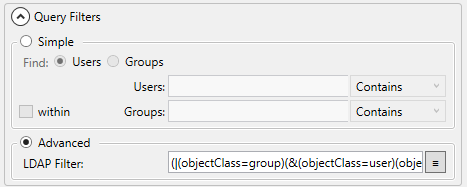
The Query Filters options allow you to filter on Users, Groups, or Users within Groups. Under Advanced you can apply a specific LDAP filter, using standard LDAP filter syntax.
![[Note]](images/note_1156523861.png)
Please see LDAP Authentication in Using Security for more information.
The Account List options let you search the list, and display only users, groups, or both. To choose users and/or group accounts, check the Select box for each one.
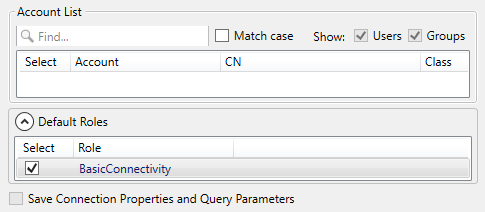
The Default Roles options are there for convenience. You can also check the box to avoid having to re-enter the parameters each time you want to import an account. These two options are only enabled after you have successfully connected to the LDAP server.
Press the button to confirm and close the dialog.
Users tab - Authentication
DataHub software supports multi-factor authentication (MFA). Typically, this area displays each authentication factor for the selected user and allows you, as the administrator, to configure other authentication specifics.
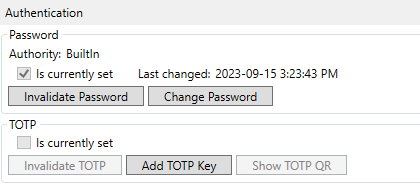
In addition to the use of a password, you can also configure a user account to
require a TOTP token. To enable TOTP (time-based one-time password) authentication,
at least one principal needs to be included in the
RequireTotpAuthentication role.
Modify the password and TOTP configuration for each user.
Users tab - Principals
View, add, and edit one or more Principals for each user. Each principal is associated with a specific User account and defined with an IP Pattern and Interface.
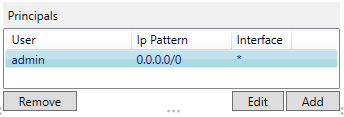
- IP Pattern
The connection source, using CIDR (Classless Inter-Domain Routing) notation. For example:
0.0.0.0/0matches any IP address135.92.0.0/16matches any address that matches the first 16 bits175.91.16.1/32matches only the address175.91.16.1
- Interface
The connection protocol, which must be one of
*(any),DDE,Mirror,MQTT,OPC,OPCUA,TCP. For example, a principal could be configured to only authorize connections via MQTT. Even if someone knew the user name and password (and could therefore authenticate), the connection would not be permitted access to applications or data.
Each principal can be assigned different roles.
By default, each new user gets a principal for Ip Pattern
0.0.0.0/0 and Interface
*, and is assigned role membership of
BasicConnectivity and
RequireTotpAuthentication. These defaults can be changed in
Settings.
| |
Requiring TOTP authentication only makes sense for an interactive user
account. When creating user accounts for things like Tunnel/Mirror and MQTT,
do not add the user to the |
Users tab - Roles
Choose roles for each principal (above).
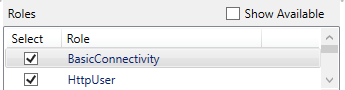
The option lets you view all available roles. Use the checkboxes to add or remove roles for the selected principal.
Users tab - Effective Permissions
At run-time, the DataHub instance determines effective permissions by
Identifying the principal that best matches the connection context (i.e., comparing the incoming IP address against principal IP patterns and the incoming connection protocol against the principal interface).
For the best-match principal, identifying all its member roles.
Aggregating all permissions assigned to any of the principal-roles.
To facilitate administrative understanding and troubleshooting, effective permissions for each selected principal are listed in the right-most pane, Effective Permissions.
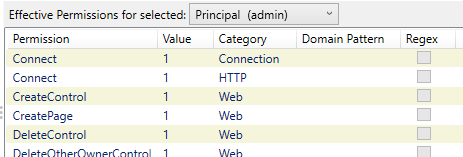
Choosing shows all permissions for all roles of the currently selected principal. Choosing shows just the permissions for the selected role.
| |
Choosing between Principal and Role has no impact on the effective permissions determined by the DataHub instance at run-time. This is merely a tool for administrative analysis. |
Menus
There are three menus for Security Configuration: , , and .
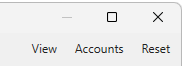
The menu allows you to switch between tabs and to customize the interface.
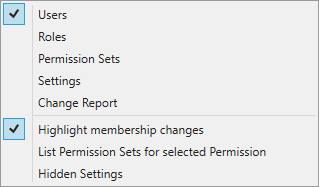
Colors the labels of roles and permission sets red whenever they are added or changed. This highlighting remains in effect until you click the or button
In the Permission Sets tab, opens a list of all permission sets to which the selected permission is assigned.
In the Settings tab, displays all of the hidden (rarely used) settings.
The menu offers one option:

Opens the Import Accounts dialog that allows you to import an LDAP user, which is also used for adding an LDAP user (see above).
The menu offers one option:

Restores the system defaults without changing any users, roles or permission sets that you have created. This is not reversible.
Roles tab
Here you can add, modify or remove roles for your Local organization, as well as associate permission sets and principals with them.
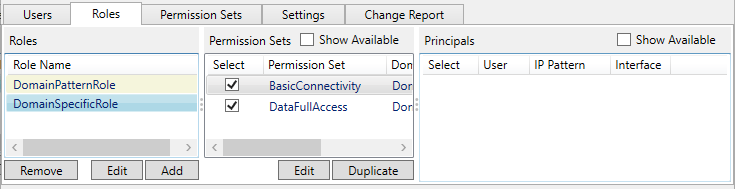
| |
Typically, users in the Local organization are configured with pre-defined roles from the Internal organization. You will only need to create your own roles to specify other sets of data permissions. For more information see Custom Data Permissions. |
- Roles
The and buttons prompt you for a role name. The button immediately removes the selected role.
- Permission Sets
The option lets you view all available permission sets. Use the checkboxes to assign or remove them from the selected role. The and buttons prompt you for a DataHub domain pattern, entered as a string. You can use an exact domain name, or match a pattern using regular expressions, whose use and syntax can be found here. The button immediately removes the selected permission set.
- Principals
The option lets you view all available user principals that can be assigned. Use the checkboxes to assign or remove them from the selected role.
Permission Sets tab
This option lets you add, modify, duplicate or remove permissions sets for your Local organization, as well as duplicate permission sets in the Internal organization.
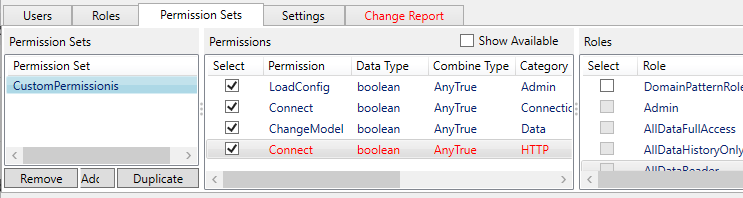
| |
As with roles, users in your Local organization are typically configured with pre-defined permission sets from the Internal organization. This option is available for creating custom permission sets not available there. For more information see (link to How-To Advanced section) |
- Permission Sets
A list of the permission sets available for the Internal or Local organizations. Only the Local organization sets are editable, using the and buttons. The button immediately removes the selected permission. The button allows you to duplicate Internal or Local permission sets.
- Permissions
The option lets you view all available permissions. Use the checkboxes to assign them to, or remove them from, the selected permission set.
- Roles
The option lets you view all available roles. Use the checkboxes to assign the current permission set to, or remove it from, the various roles.
Settings tab
Here you can customize the Configure Security interface itself, according to several settings.
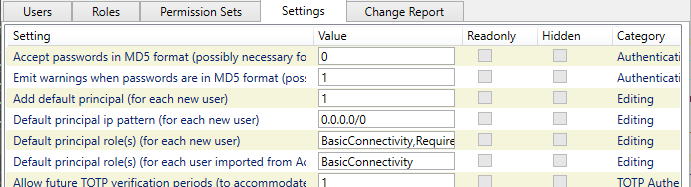
By category, here is what is available:
- Editing
These options let you edit the default settings for principals.
- TOTP Authentication
These options allow you to accommodate discrepancies in clock settings between the computer running DataHub software and the verification device for TOTP.
- TOTP Configuration
Let you configure the TOTP application name and issuer.
- TOTP QT Code Configuration
Gives you the ability to use or not use a QT code, and if so, what colors it should be.
- Warnings
Various warnings as described in the interface. Setting Warn when using the default 'admin' password to 0 turns off the dialog that appears when starting the DataHub instance.
Change Report tab
The system keeps a record of all uncommitted changes.
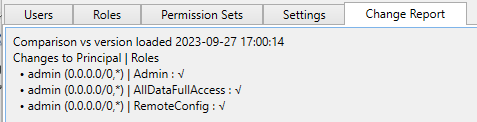
While editing security, all of your changes are displayed in red and listed in this report. These changes get applied when you click the or button, and the report is erased.