3.16. Notification

|
The Notification option allows you to generate alarms, events and notifications for conditions based on data point values. When a condition is met, a notification can be emitted by changing a data point or sending email, SMS, OPC A&E or social media messages. |
![[Note]](images/note_1156523861.png) | |
For step-by-step instructions to get started using this option, please see Making Notifications. |
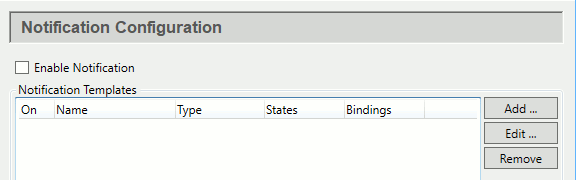
The checkbox enables or disables all templates and notifiers. The and buttons open the Configure Template window to create or modify notification templates.
Notification Templates
Templates are created and modified in the Configure Template window.
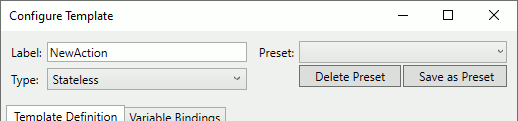
- Label
A text string that identifies this template.
- Type
Examines each Condition for each defined state in order, and executes the
IfTruescript for the first true condition.A data point change will result in at most one
IfTruescript being executed. This is useful when you want to perform an action on every point change, with the action depending on the point value.Examines each Entry Condition for each defined state in order, and executes the
OnEntryscript for the first true condition. Once the state has been entered, no further scripts will be executed until the Exit Condition for that state is met, at which time theOnExitscript is executed and then each Entry Condition will be examined again to possibly enter a new state.A data point change will result in at most one
OnExitscript and oneOnEntryscript being processed. This is used for conditions that consist of multiple mutually-exclusive states, similar to OPC A&E conditions.Examines the Condition for every defined state, and if that condition is true then executes the
IfTruescript.A single data change could result in multiple
IfTrueevents being triggered. This is used when you simply want to specify a condition/action that gets re-evaluated on every point change.This is a form of Stateful template that also generates data points that implement the data point format for OPC A&E Conditions. The OPC A&E server feature uses these points to create and transmit OPC Conditions to connected OPC A&E clients. This template also monitors the OPC A&E acknowledgement point for each condition to respond to acknowledgements from external clients.
This is used when you want to generate and manage OPC A&E alarms from process data.
This is a form of Stateful template that also generates data points that implement OPC A&E Simple Events. This is used when you want to generate transient events from process data. Events will only be generated when there is a state change and an entry condition to a new state succeeds.
This is a form of Stateless template that also generates data points that implement OPC A&E Simple Events. This is used when you want to generate transient events from process data. Events will be generated any time a trigger causes one of the state entry conditions to succeed.
This is a form of Stateless template that monitors OPC A&E Condition points provided by external OPC A&E servers. When an A&E condition event occurs, this template will extract the condition information and make it available to the Condition and
IfTruescripts to allow notification based on the A&E information.This is used when you want to send an email, SMS, etc. based on OPC A&E events from an external OPC A&E server.
This is a form of Stateless template that monitors OPC A&E event points provided by external OPC A&E servers. When an OPC A&E Simple or Tracking event occurs, this template will extract the event information and make it available to the Condition and
IfTruescripts.This is used when you want to send an email, SMS, etc. based on OPC A&E events from an external OPC A&E server.
- Preset
The allows you to save any notification template for re-use. Once saved, the template name appears in the drop-down list. Thereafter you can select from the Preset list to populate a new template, which you can then modify. Modifying the template does not modify the preset.
- Template Definition
The DataHub instance uses templates to let you create many similar notifications from one source. Each template consists of variables associated with states and scripts, to which point values can be assigned.
- Event Settings
 (for OPC A&E
Condition and OPC A&E
Event types only)
(for OPC A&E
Condition and OPC A&E
Event types only) A&E Data Domain: The DataHub data domain configured for OPC A&E data. This is where the OPC A&E data will be written. If you have also installed the OPC A&E feature then these events will be available to OPC A&E clients.
Condition Name: For OPC A&E Condition only, a name for this condition.
Source (Script): The source of the A&E condition or event that can trigger a script. See Event Settings (Scripts) below.
Category: The OPC A&E category for this condition or event.
Accept incomplete ACK: Selecting this option allows you to acknowledge a condition by writing
1to the corresponding point inOPCAE:Ack.. This provides the ability to acknowledge a condition from any data source.condition-nameOnAcknowledgeScript: For OPC A&E Condition only, a script that runs when this condition is acknowledged.
- Variable Definitions
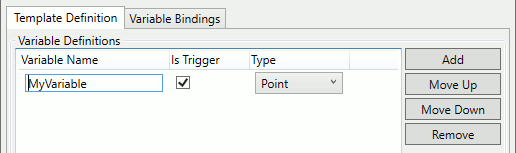
- Variable Name
A text string of only letters, numbers and the underscore (
_) character, with no spaces or other characters, so that this name can be used as an identifier in a script.- Is Trigger
When selected, any change to point(s) assigned to this variable will trigger re-evaluation of the states, according to the Type of the template (Stateful, Stateless or Every State). Only points can be triggers.
- Type
One of:
Point: a DataHub point, whose value, quality, and timestamp will be available to Condition and Action scripts.
Integer: a 64-bit integer literal.
Double: a double-precision floating point literal.
String: a character string.
- States
Notifications are based on the state of the system, which is determined by point values and possibly other factors.
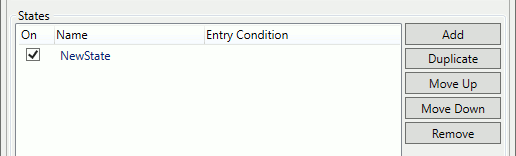
Each state has a Name and typically an Entry Condition, as defined in State Properties, below. The states are evaluated in sequence from the top to the bottom of the list. You can use the and buttons to change the order of evaluation.
- State Properties
The state properties available depend on the Type defined for the template.
-

In Settings, the Name is a text string that identifies the state. States are evaluated when a data point that Is Trigger has a change in value or quality. The Only trigger on Good quality option indicates that a point change that has a bad quality should be ignored by this state.
-

Scripts run when the associated conditions are met. The options for scripts and conditions depend on the type of notification.
For State, Stateless, and Alerter types, the
IfTruescript runs whenever the Condition is met.For Stateful, OPC A&E Conditions and OPC A&E Events types, the OnEntry script runs whenever the Entry condition is met while the action is in that state. If no
OnExitscript is specified then the Exit condition is defined to be the inverse of the Entry condition.
Some or all of the following properties are available for OPC A&E Condition and OPC A&E Event Types.
-

The Event Settings properties that are defined as scripts allow you to create strings that include action-specific information like the name of the trigger point. For example, if the trigger variable is called
MyTrigger, then it may be helpful to define Source (Script) (see above) asMyTrigger.Nameand Message as:MyTrigger.Name + “ has reached “ + MyTrigger.Value
Message: A message associated with the A&E condition or event.
Description: A description of the A&E condition.
Definition: A definition of the A&E condition.
-
Severity: The severity of the A&E condition or event. Severity must be in the range of 1 to 1000.
Requires Ack: Sets this OPC A&E condition as requiring acknowledgement if it enters this state.
Is Inactive State: Sets this state of the A&E condition to an inactive state. OPC A&E clients often use this indicator to decide whether to display the condition to an operator.
-
- Event Settings
- Scripts
Scripts are used to set criteria for states and to assign notification actions.
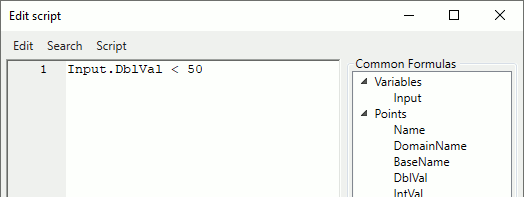
The scripting language is S-Sharp, which is documented here.
- Common Formulas
The script editor includes a list of common script formulas and fragments. You can position the edit cursor in the edit window, and then double-click any of the formulas to insert the text into the edit window. You can also make use of many classes and methods defined by the .NET framework.
Variables: All of the variables you have defined for this template.
Points: Properties of DataHub points that are accessed by using dot (
.) syntax on a variable name, if that variable is of type Point.Application: Functions that are supplied by the application. Most of these functions correspond to similar MQTT Advanced Parer functions, which are documented in this section of the MQTT documentation.
Notifiers: Any notifiers you have configured.
LogLevel: Used in the “level” argument of the
app.Logfunction.PointQuality: Each possible value of DataHub point quality. This is used as the
qualityargument in the app.WritePoint function.Math: A selection of common mathematical functions.
Statistics: The available statistics for a point that is being tracked using the
app.StatisticsfunctionNotification scripts can make use of sliding-window statistics to assist with more complex conditions. For example, you may only wish to generate a notification if a data point value has exceeded a threshold and it has been trending strongly upward over the past 60 seconds. To do that, you would need to know the slope of the recent values for that point.
When you include a formula of
app.Statistics(point,
												seconds)
in your script, the script engine will automatically begin collecting statistical information for that point, for a period specified in seconds, starting from the first execution of the script. Subsequent calls to the same formula will then have access to all of the statistical measurements available, computed over the time period (or less if statistics have been gathering for less than the time period). The available statistics are:Average: A simple average of all measurements within the time period.
TimeWeightedAverage: The time weighted average of all measurements within the time period. Measurements that hold a value for a longer time will have a larger effect on this average.
Count: The number of measurements in the time period.
Slope: The slope of the linear regression
Y = mX + Bover the time period, producingdelta Y/day.Intercept: The
X-intercept of the linear regressionY = mX + Bover the time period, producing the date ofY = 0.SampleStdDev: The sample standard deviation
(N-1)of all measurements in the time period.SampleVariance: The sample variance
(N-1).PopulationStdDev: The population standard deviation
(N).PopulationVariance: The population variance
(N).
- Testing
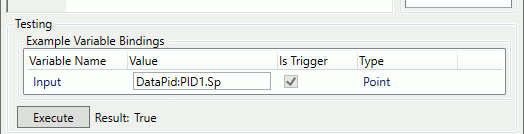
You can test your script by entering values for the variables and pressing the button. This will execute just this script, as if its trigger condition had been met, using the variable values that you enter into the Testing area. You must supply values for all variables. If your script has side effects, such as sending an email or SMS message, then those side effects will occur.
- Variable Bindings
DataHub points and other values are bound to templates, providing an easy way to reuse and reconfigure notifications as needed. Binding is done by assigning points or values to template variables. In the Template Definition section you are supplying placeholders for data points and values. Here in the Variable Bindings section you are creating one or more sets of concrete values for those placeholders.
- Binding Definitions
A binding definition is the set of all concrete values for a single instance of the action template. That is, each line of the Binding Definitions list specifies all the values for the variables in the template, and each line constitutes a distinct instance of the template. For example, if you want to generate a notification based on the water levels in
Tank1andTank2, you would create a separate binding definition for each ofTank1andTank2. The template specifies how to handle notifications for tanks in general, and the two binding definitions then apply that to tanks 1 and 2.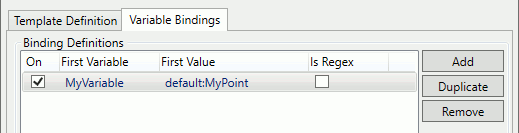
Only the First Variable binding is displayed in this list to help you identify each binding definition.
- Variable Bindings
Variables are bound by entering values according to each variable's Type (a DataHub point, integer, double, or string) defined previously.

The first variable in the binding definition is treated differently from the others. This variable can be defined as a regular expression instead of a simple string. This regular expression can match any number of data points, and each match will be treated as a distinct binding definition. This allows you to create a single binding definition that applies to all data points matching a pattern. Regular expressions use .NET Regex syntax. The comparison succeeds if the regular expression matches any part of the point name, so if you want a full string match ensure that the regular expression is bounded by the ^ and $ characters (start and end of string respectively).
For example, if we have 2 tanks, whose levels visible in the points
Plant:Tank1.levelandPlant:Tank2.level, then the patternPlant:Tank[0-9]+\.levelwill match any point whose name isPlant:Tankfollowed by any sequence of digits, followed by the string.level. Thus, this one binding will apply to both tanks. If we later add a third tank, namedPlant:Tank3.level, then this binding will apply automatically to it without any change to the notification configuration.When the first variable binding is a regular expression, we may also want to make other variable bindings relate to that regular expression. For example, we may want to create a new point,
Plant:Tank1.alarm, which has a value of0in normal operation and1when the level is too high. In that case, we would have two variables, namedInputandOutputwhereInputisPlant:Tank1.level, andOutputisPlant:Tank1.alarm. TheOnEnterandOnExitscripts in the notification template would write values of0or1to theOutputvariable as appropriate.However, if we use a regular expression to match all tanks, then we need a way to say that
OutputisPlant:Tank1.alarmwhenInputisPlant:Tank1.level, butOutputisPlant:Tank2.alarmwhenInputisPlant:Tank2.level, and so on. We can accomplish this with regular expression captures. A capture is a portion of the input string that matches a portion of the regular expression. Captures are denoted by parentheses in the regular expression.For example, in our tank expression,
Plant:Tank[0-9]+\.levelwe would like to identify the numeric sub-expression and use it to definePlant:TankN.alarm, whereNis any number. We do this by adding parentheses around the numeric portion of the expression:Plant:Tank([0-9]+)\.level. This will result in a capture that contains only the digits after the wordTank. There can be multiple captures in the regular expression, and they will be numbered in order starting from zero.Now, to construct an alarm point name that corresponds to the level point, we can define
OutputasPlant:Tank{0}.alarm. The{N}syntax tells the binding to substitute the Nth capture from the regular expression in theInputvariable into that position in the binding of theOutputvariable. In this example we want the first capture, which is{0}. You cannot use the{N}syntax in the first variable binding, since that is the regular expression binding that produces the captures. Captures are strings, so numeric .NET format substitution qualifiers cannot be used.
An explanation of the use and syntax of .NET Regular Expressions can be found here. Please see Regular Expressions in the Making Notifications chapter for an example.
- Regex Explorer
You can use the Regex Explorer to see how a regular expression will be implemented.

In the First Variable entry field, enter the name of a data point. If it meets the criteria of the regular expression, it will be displayed in the Value column. All other variables in the binding definition will be displayed, with the capture substitutions shown so you can verify that both the regular expression and its captures are what you intend.
Notifiers
To add a notification template, press the button...
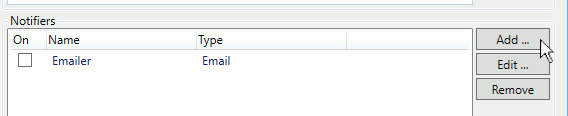
...to open the Configure Notifier window:
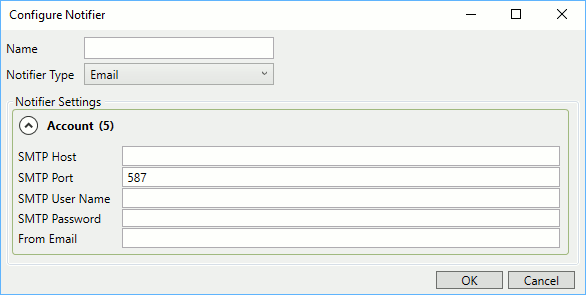
Enter a Name to name this notifier. The name must be a text
string consisting of only letters, numbers and the underscore ( _
) character, with no spaces or other characters, so that it can be used as an
identifier in a script.
Then choose one of the following, and enter the necessary details:
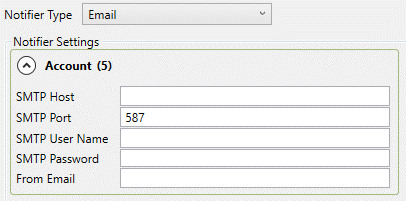
- SMTP Host, SMTP Port, SMTP User Name, SMTP Password,
The appropriate entries for the SMTP account from which the emails will be sent. Email is always sent using TLS. Attempts to send email via a plain-text email server will fail.
- From Email
The email address from which the emails will be sent.
This option allows you to emit data to an HTTP server, like an SMS gateway.
Currently in the proof-of-concept stage.
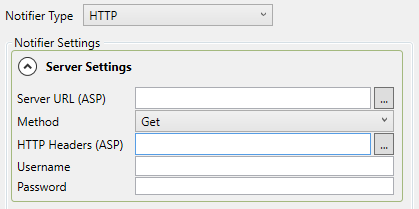
- Server URL (ASP)
The URL for the HTTP server that this notifier will connect to.
- Method
The HTTP method (GET or POST) for this notifier.
- HTTP Headers (ASP)
ASP code that will be added to the HTTP message header.
- Username and Password
The user name and password required by the HTTP server.
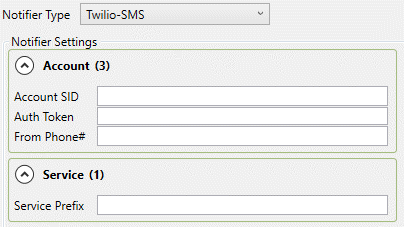
- Account SID, Auth Token, From Phone#
The service ID, authentication token, and phone number for the account from which the text messages will be sent. This information is available from your Twilio account. If your Twilio account is being managed by Skkynet then you should have received this information from them.
- Service Prefix
The Twilio service prefix for the service you are using. The defaults are blank for and
whatsappfor . As more Twilio services become available, you can use this service prefix to direct the messages to other social networks and delivery mechanisms.