12.3. MQTT Advanced Parser Tutorial
Both the MQTT Client and MQTT Broker features include an Advanced option that allows you to accept and use any number of different JSON formats for incoming and outgoing MQTT messages. This lets you integrate MQTT data between MQTT clients, as well as all other DataHub protocols.
This section of the documentation is an introduction to the MQTT Advanced Parser interface, a brief walk-through to illustrate how to use it. For more information, please see MQTT Advanced Parser Reference.
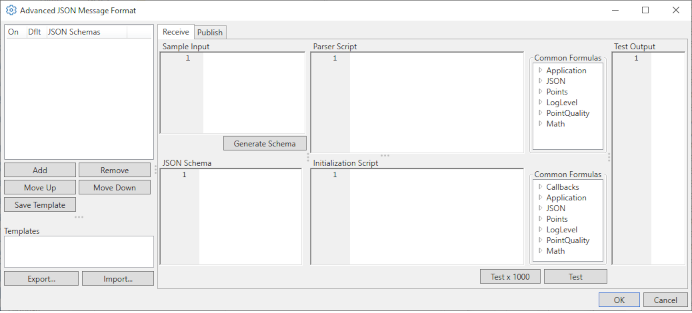
The Advanced JSON Message Format window consists of four main panels, which are typically used in sequence:
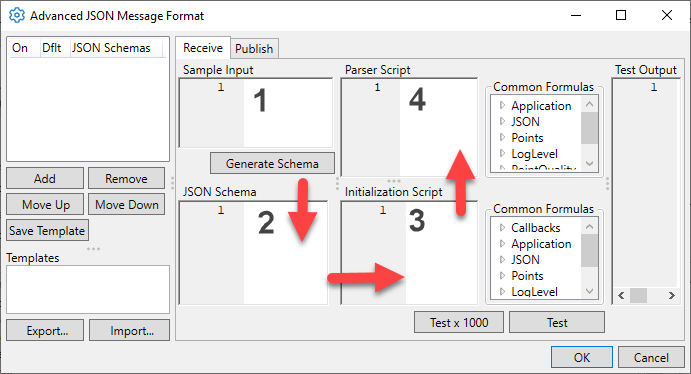
Sample Input is where you start, by putting in an MQTT message sample. This should be a complete sample, with the maximum message content that the device can produce. If your device manufacturer does not provide a sample message format, you can determine one by setting the DataHub MQTT Broker to treat all messages as plain text, then connecting the device. (See how.) The message will be placed in a data point in the DataHub Data Browser, and you can copy it from there.
JSON Schema is the JSON schema that describes the messages that the device produces. If the device manufacturer provides a schema, you can enter it here. If not, enter a sample message (above) and press the button to create a schema from that message. If necessary, you can then edit the schema to add missing fields or remove any that are not required. Your schema should include a "required" member listing all fields that are guaranteed to be part of all messages. If no "required" member is set then all valid JSON will match the schema, which makes it impossible to differentiate different device schemas.
Initialization Script is run just one time, when the first message using the schema is received for each topic. This is used to create functions that will run once per topic, or once per received message to guide the parsing process. If the device is generating data at high speed, place as much of your code here as possible to minimize the CPU load when parsing messages from the device. This script can be empty.
Parser Script is run for every message received from any MQTT topic that matches the schema. It extracts data from the message and writes it to DataHub data point values. The minimum parser script consists of a single line:
app.ProcessJson();
12.3.1. Example - Part One
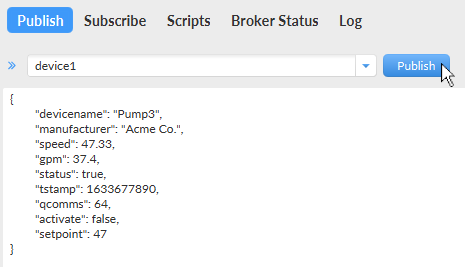
An example device may be generating MQTT messages with content like this:
{"devicename": "Pump3","manufacturer": "Acme Co.","speed": 47.33,
"gpm": 37.4,"status": true,"tstamp": 1633677890,"qcomms": 64,
"activate": false,"setpoint": 47}
Or, to make it more readable:
{
    "devicename": "Pump3",
    "manufacturer": "Acme Co.",
    "speed": 47.33,
    "gpm": 37.4,
    "status": true,
    "tstamp": 1633677890,
    "qcomms": 64,
    "activate": false,
    "setpoint": 47
}
Each line represents an MQTT topic and its value, which you might want to put
into a DataHub instance, as DataHub points. For this example, let's say you don't need
the manufacturer topic to show up as a DataHub point. And you
want to have the tstamp topic act as a timestamp for several
other points, and qcomms as their quality.
In this first part of the example, we will enter the message and generate a schema. Then we'll modify the output with a simple script, test the results, and view them in the Data Browser.
In the DataHub Properties window, go to MQTT Broker.

For this demo, in Point names, check the button, enter
MQTT-Broker, and click the button.
In Message format, select and click the button.

The Advanced JSON Message Format window will open.
Create a new JSON schema by selecting the button in the top left-hand panel. Give your schema a name that identifies the type of device that generates these messages.
Select your newly-created schema in the list.
Copy the example device output given above into the Sample Input panel.
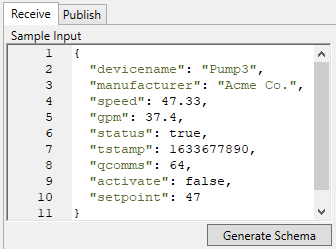
Click the button. The system will generate a JSON schema and display it.

To the right of the Initialization Script panel, in the Common Formulas, open the Application group and double click ExcludePaths. It will put the
app.ExcludePathsfunction into the Initialization Script panel:app.ExcludePaths = [];
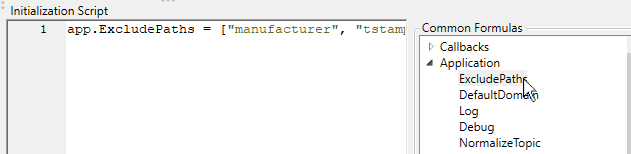
Add these names of the topics to exclude, as strings:
app.Excludepaths = ["manufacturer", "tstamp", "qcomms"];
We put
tstampandqcommshere because although we will be using their data later in the next part of the example, we don't want them to be treated as points by the DataHub engine.Notice that there is one line, the
app.ProcessJson()function, in the Parser Script panel: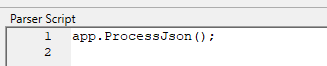
This is the default entry, the minimum needed to process the JSON output. We will leave it as-is for now.
Click the button at the bottom of the Initialization Script panel.
In the Test Output panel, you should see something like this:
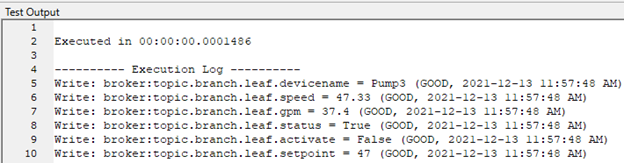
This test feature lets you see what will get sent to your DataHub instance. You can use it to check for errors in your scripts, and to ensure you have the right format and content for your data points. If you don't see something similar to this, check your work, make any necessary changes, and test again.
Once you have confirmed your test output is correct, you can click the button in the left-hand panel to save your settings as a template.

Enter a name for your template, and click .
Then click the button at the bottom right of the Advanced JSON Message Format window to close it.
Click the button in the Properties window to apply and save your changes.
To test your configuration, you will need to send an MQTT message in the same format to your DataHub instance. You can use any MQTT test client. Connect it to the DataHub instance, and send the message.
In the DataHub instance, click the button to open the Data Browser to see the data points and data.
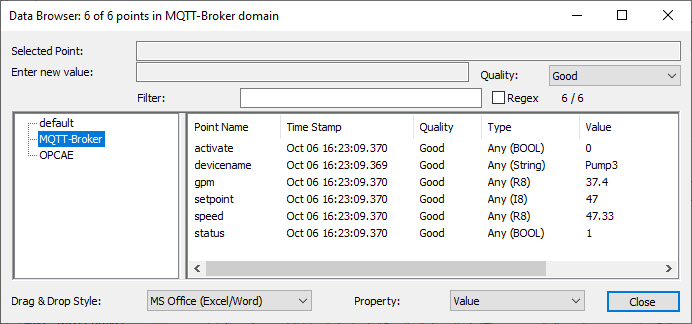
You have now seen how to enter a sample message, generate a schema, modify the output with a simple script, test the results, save and apply the template, and then view it in the Data Browser.