9.2. Quick Start
Here's how to configure a DataHub instance to write data to a database of your choice. We use a data point from the DataSim program in this example but you can just as easily use your own data point.
In the DataHub Properties window, select Data Logging.

Click the button.

This opens the ODBC Data Logging window, shown below.
![[Note]](images/note_1156523861.png)
The Data Logging Configuration interface is explained in detail in Section 9.3, “Configuring the Queue, Store and Forward”. For now, you can use the defaults.
Select the 1. DSN tab. A DSN is a Data Source Name. Windows uses this name to identify the database you want to connect to.

From the drop-down box, select a DSN. If you do not have any DSNs, or you wish to create a new DSN, you can do this by opening the DSN Administrator. Please refer to Setting up a DSN for more details.
Enter the user name and password (if required), and click the button. A "
Connected to ..." message should appear in the message box. If you get an error message in the box, consult your system administrator.
Select the 2. Table tab.

Start the DataSim program if it isn't already running, and ensure that it is connected to a DataHub instance.
In the Table name field type:
datasimtest.Click the button, type:
POINTIDin the pop-up dialog, and then click .Click under the POINTID label in the Item row.
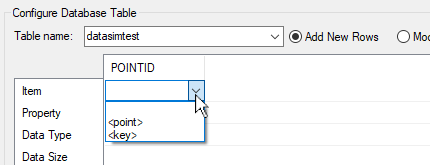
Select <key> from the drop-down list. Notice after you make your selection that the word
countergets entered automatically for the Data Type.Click the button and enter the name
PTNAME.In the point-picker list on the right, expand the
DataSimdata domain and select the point namedSine.In the PTNAME column, click in the Item row and select
<point>. The full name of the point,DataSim:Sine, should appear.for Property in that column select name.for Data Type select varchar(or the equivalent).for Data Size the system might have entered a value for you. If not, type in a value like 64and click Enter.Click the button again and add the column name
PTVALUE. Then make these entries:for Item select <point>. (The point name,DataSim:Sine, should appear.)for Property select value.for Data Type select number(or the equivalent).for Data Size, depending on your database, you might not be able to enter anything. If you are able to make an entry, you can type in a number of bytes and click Enter. The entry fields should now look similar to this:

Click the button. If successful, you have now created a new table in the database specified by your DSN. You can open your database program and view it to verify. If you get an error message, check your entries above carefully to ensure they are compatible with your database. For example, some databases will not allow spaces or special characters in table and column names.
Once the table is created, you cannot add any more columns. However, you can delete the table using the button. This will delete the table from the database, but all of your entries will remain in the entry fields. You can then add more columns if you wish, and recreate the table. You can easily rename, insert, or delete a column by right-clicking on the column name for a pop-up menu. For more information about creating and modifying tables, please refer to Section 9.5, “Configuring a Database Table”.
When you have the table the way you want it, go down to the Configured Actions box and click the button.

A new configured action should appear in the list. For more information about configured actions, please refer to Section 9.9, “Configured Actions”
Next, to get the DataHub instance to write the data, you need to assign a trigger.
For this example, we will trigger the action whenever the
DataSim:Square point changes value.
Select the 3. Trigger tab.
From the point selector, expand the
DataSimdata domain and select the pointSquare.Click the button to the right of the Point Name field. The point name
DataSim:Squareshould fill in for you.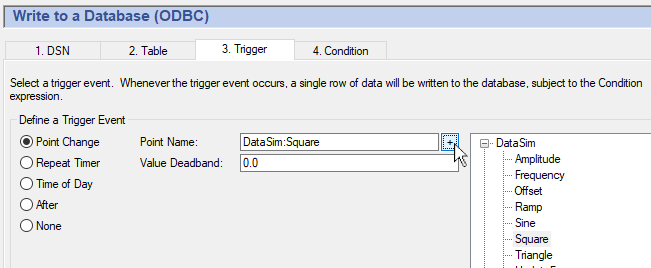
You can choose any point for the trigger, including the point that gets written, such as
DataSim:Sinein our example. For more information about triggers, please refer to Section 9.7, “Assigning a Trigger”.In the Configured Actions box, make sure that the configured action you just created is highlighted. If not, click on it to highlight it. Then click the button.

Your configured action should now display the
DataSim:Squarepoint as your Trigger.Click the button to activate the configured action.
Open the Script Log to check for error messages and ensure that your data is being written successfully. Each write action to the database gets logged here. You can also verify the writes by querying the database itself.
You have just configured an action that logs the name and value of the
Sine point in the DataSim data domain
whenever the value of the Square point changes. Now you can
create tables to log your own data, with triggers based on points or timers.
The remaining sections in this chapter explain the interface in more detail, and introduce the option of setting specific conditions for logging, if desired.