4.2.2. Symbol Binding
Using the same page as above, add a Symbol control.

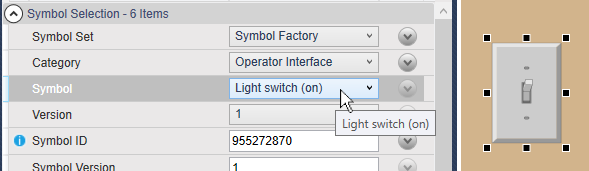
In the Symbol Selection for the Symbol Set, select Symbol Factory, for the Category, select Operator Interface, and for the Symbol, select Light switch (on).
Select the ShiningLight control, and in the Basic Properties, right mouse click on Is Light On to copy the reference.

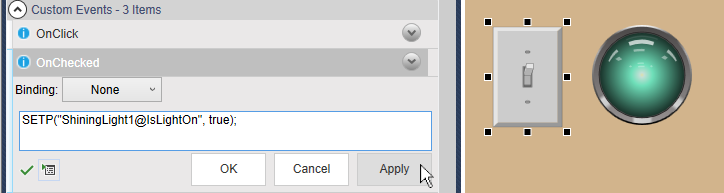
Select the Symbol (light switch) and in Custom Events, for OnChecked Event, enter:
SETP("ShiningLight1@IsLightOn", true);Then press the button.
In Custom Events, for OnUnChecked Event, enter:
SETP("ShiningLight1@IsLightOn", false);Switch to Run mode and click the light switch symbol to turn the Shining Light on and off.
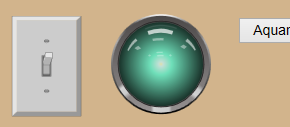
This works OK, but it looks strange to have the light go off when the light switch is still in the ON position. We'll fix that next.
Select the Symbol (light switch) and in Custom Events, for OnChecked Event, add one more line:
SETP("ShiningLight1@IsLightOn", true); SETP("@SymbolID", 955272870);![[Note]](images/note_1156523861.png)
For this and the next step, the string
@SymbolIDrefers to the symbol itself.In Custom Events, for OnUnChecked Event, add one more line:
SETP("ShiningLight1@IsLightOn", false);
SETP("@SymbolID", 1685125442);
Switch to Run mode and click the light switch symbol to turn the Shining Light on and off.

Now the symbol changes from Light switch (on) to Light switch (off) as the light goes on and off.