2.4. Importing and Exporting Configuration
![[Important]](images/important_2051192373.png) | |
This is only available in the Remote Config application, not in the DataHub Properties window. |
The Remote Config application allows you to import and export configuration from CSV files. Each of the Remote Config interfaces for OPC DA, OPC UA, Bridging, MQTT Client, Modbus, and Historian has an and an button in its client configuration window that allows you to import configuration from CSV files in bulk, as well as export it to CSV files.
Locate the or button for the feature you need, as listed below: OPC DA, OPC UA, Bridging, MQTT Client, Modbus, External Historian, Historian.
To import, use the button to open the Import Items window, as explained in Configuring.
To export, click the button, enter a file name in the directory of your choice, and click the button.
Use the Property Lists to see which properties are available for each feature.
2.4.1. Accessing the Import and Export features
The and buttons are located as shown for each feature.
OPC UA
In the OPC UA option, click the button.

In the Configure OPC UA Data Access Server dialog, check the box and click the button.

The and buttons are near the bottom of the Configure Nodes dialog.

OPC DA
In the OPC DA option, click the button.

In the Configure OPC DA Server Connection dialog, check the box and click the button.

The and buttons are near the bottom of the OpcDaItemSelector dialog.

Bridging
The and buttons are at the bottom of the Bridging options.

MQTT Client
In the MQTT Client option, click the button.

In the Connect to MQTT Broker dialog, the and buttons are in the Push data points to the MQTT broker section.

Modbus
In the Modbus option, click the button.

In the Connect to Modbus Slave dialog, the and buttons are in the Data Points section.

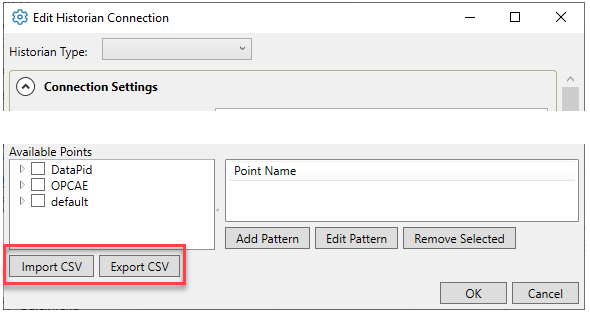
External Historian
In the External Historian option, click the button.

In the Edit Historian Connection dialog, the and buttons are at the bottom of the point selection options.
DataHub Historian
In the Historian option, click the button.

In the Configure Historical Data Capture dialog, the and buttons are at the bottom of the point selection options.
