14.4. Tunnel (Push)
The DataHub program can use its Tunnel/Mirror feature to forward historical data between configured external historians. Like real-time tunneling, historical data tunnelling uses a DataHub instance on each end of the tunnel. One DataHub instance gathers data from a source, and sends it across to the other DataHub instance, which writes it to the historian.
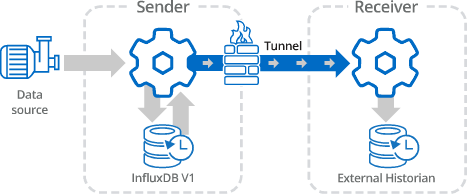
Since each DataHub instance functions independently, you can write data to a local external historian on the sending side, as well as tunnelling it. This lets you store and forward data to maintain a complete data set despite any network problems.
![[Note]](images/note_1156523861.png) | |
The external historian used for all sending DataHub instances must be InfluxDB, which requires a 64-bit Windows operating systems. |
The tunnel itself can be configured either to push data from the sender to the receiver, or to have the receiver pull data from the sender. In this first example we will write the values from a DataPid point to an InfluxDB historian locally, and simultaneously push those values to another InfluxDB historian across the network. The sending DataHub instance will be configured to forward any values lost due to network failure, using data from the local InfluxDB database.
This example assumes that you have successfully configured a connection to InfluxDB as described in Connecting, and continues from there.
Forwarding Strategies
In the DataHub External Historian, in Forwarding Strategies, click the button:

Configure a forwarding strategy as follows:

Strategy Label:
FwdByTunnelLocal historian label:
Influx1
When finished, click and . This forwarding strategy will be used in the historian tunnel, which you will configure next.
In the Write data to Historians area click the button.

Choose a connection, and configure it like this:
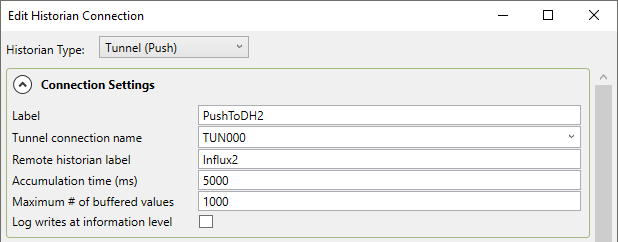
Label:
PushToDH2Tunnel connection name:
TUN000Remote historian label:
Influx2
You will also need to configure Forwarding, like this:

Enable historical data forwarding:
checkedForwarding strategy:
FwdByTunnel
Notice that when you check , the Available Points are deselected. This is because you will be forwarding all of the points from the data. When finished, click and .
Tunnel/Mirror
To move the data across to the receiving DataHub instance you will need to configure a Tunnel/Mirror connection.
In the Tunnel/Mirror option
 click the
button.
click the
button.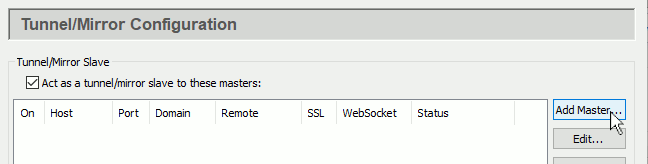
Configure the following:

Connection Name: Use the pre-entered value of
TUN000.Primary Host: The name or IP address of the receiving side computer.
Port: Keep the default of
4502.
You can leave all other options at their default settings. When tunnelling external historian data, the local and remote data domain names are not used, and the data flow and connection options are ignored.
When finished, click and .
If the DataHub instance on the receiving side is installed and running, and has its Tunnel/Mirror Master configured for port 4502 (the default), then the tunnel Status should soon change to Running.
Now you are ready to configure the receiving side.