2.5. Test MQTT
Here is a quick way to test both the DataHub MQTT Broker and MQTT Client, by connecting them to each other.
Configure the MQTT Broker
In the Properties window, select MQTT Broker.

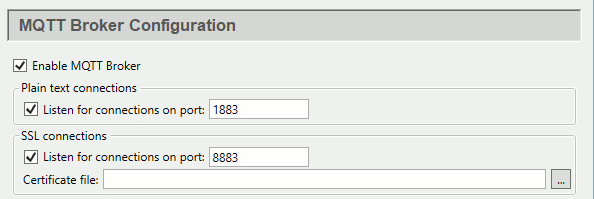
In the Point Names options, check the box, and enter
MQTTBrokerfor the domain name.
Click .
The DataHub MQTT Broker is now ready to accept MQTT client connections for the MQTTBroker domain. For more information about the MQTT Broker feature, please refer to Section 3.13, “MQTT Broker”.
Configure the MQTT Client
In the Properties window, select MQTT Client.

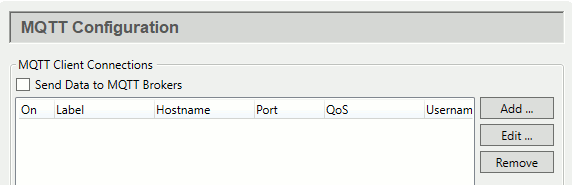
Click the button to open the Connect to MQTT Broker window:
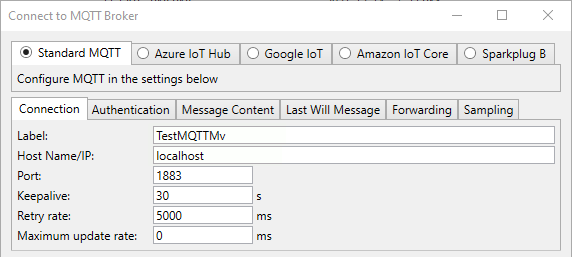
In the Standard MQTT section, Connection tab, enter the following:
Label:
TestMQTTMvHost:
localhostPort:
1883(the default)Keepalive:
30(the default)Retry rate:
5000(the default)Maximum update rate:
0(the default).
In the Push data points to the MQTT broker section, Available Points list, open the DataPid tree and select the point
Mv. (If you don't see theDataPiddomain, start DataPid.)
Click the MQTTBroker domain in the domain list to highlight it.
Click , and then .
Click the View Data button in the Properties window to open the Data Browser. In the MQTTBroker domain you should see the value for DataPid.Mv updating.

You have now configured the DataHub MQTT Client to send a value to the DataHub program via the MQTT Broker. For more information about the MQTT Client feature, please refer to Section 3.12, “MQTT Client”.