19.4.2. Getting a Range into Excel
There are two ways to drag and drop data into Excel to create a range, using DDE advise loops. Or you can use DDE Request and macros.
Drag and drop a group of points into Excel
Here is how you can collect a group of points in the DataHub instance and drag them all into Excel, where the data for each point occupies a unique cell.
With the DataHub instance and DataSim running, open the Data Browser.
Select a group of points in the Data Browser.
Drag the point names into Excel.
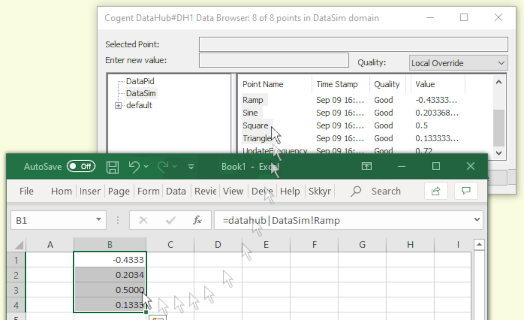
You should see the data updating in the cells.
![[Note]](images/note_1156523861.png) | |
You can drag and drop point names, timestamps, and other attributes of a point using the Property dropdown list. Please refer to Drag and Drop Style and Property in the Data Browser section for more details. |
Drag and drop an array into Excel
Here is how you can take a single point in the DataHub instance whose value is an array, and have each value in the array occupy a unique cell in Excel.
To demonstrate this, we are going to first combine the two procedures shown above to create an array in the DataHub instance.
Make an array
Select a range in Excel, such as created in Drag and drop a group of points into Excel above, and in the name box at the top left corner, enter the name
FirstRange.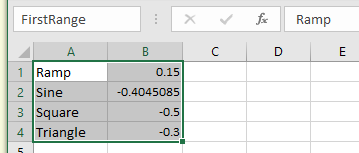
In the DataHub Properties Window, select the DDE option and make sure the box is checked. Then click the button.
In the DDE Item Definition window type in the following information:
Connection Name Type in
Ranges.Service Type in
Excel.Topic Type in
Book1, or the name of your worksheet file including the.xlsextension.Item Names Type in
FirstRange.
Click the button. The fields DDE Item and Point Name should be
FirstRange, and the Data Domain should bedefault.Click to close the DDE Item Definition window, and in the Properties Window click to close it as well.
Open the Data Browser and go to the
defaultdata domain. You should see the pointFirstRange, with a value like this:
The array is now ready to put into Excel.
Drag and drop the array
For simplicity's sake we are going to just put the same array back into Excel.
Click on the
FirstRangepoint name, and drag it into Excel, dropping it in cell D1.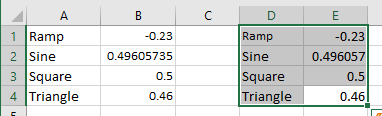
For older versions of Excel, the values don't start updating right away because you have to tell Excel how to paste in the link.
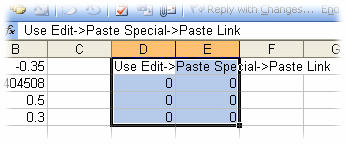
Go to the menu and select .
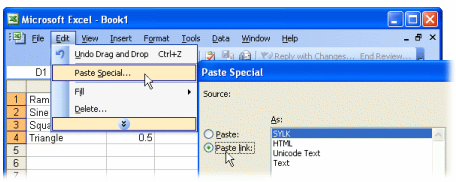
Select Paste link and click . The cells should fill with the correct, updating data.
Using DDE Request in Excel
If you are creating macros in Excel to read data from a DataHub instance, you can use the DDERequest function call. This will return an array type value that can be written directly into any range in the spreadsheet. If the array data is larger in any dimension than the range into which it is written, then extra data in the array is discarded. If the array data is smaller than the target range then extra cells in the range are filled by repeating the data in the array. See below for an Excel macro that dynamically determines the target range to ensure that all array data is entered into the spreadsheet with no duplication.