1.4. Working with Ranges
1.4.1. Demo
In addition to binding an individual cell to a DataHub point, you can also bind a range of cells. Here is a brief demo of how to work with ranges:
Select a range and enter some data into it.
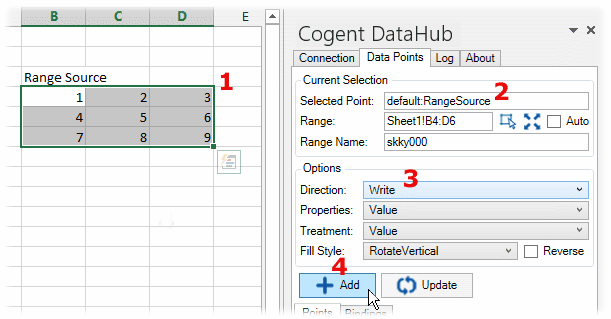
In the Data Points tab, select or enter a DataHub point name. For the purposes of this demo, this should be a data point that you can write to.
In the Direction option, choose Write.
Click the button to create the binding. This will act as your data source.
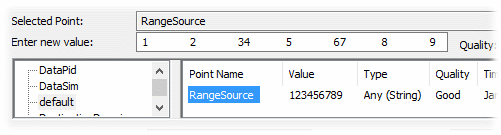
You can check your DataHub Data Browser to see that the point exists, that it is bound, and that it is a range.
Now you can create a second range to receive the data. Ensure that you still have the same Selected Point, and then in the worksheet select a single cell.
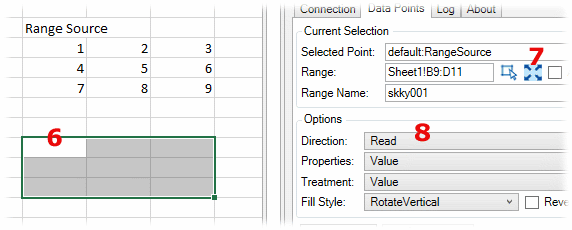
Click the the range size icon
 . The one-cell selection should expand to the size
of the bound range.
. The one-cell selection should expand to the size
of the bound range.In the Direction option, choose Read.
Click the button.
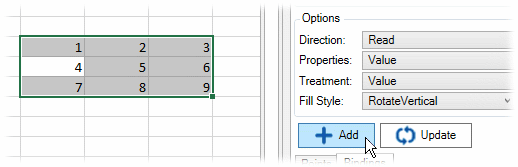
The range should fill with the data from the data source range. Now, whenever any value in data source range changes, this range will update with the same values.
What happens if the size of the source range gets changed? You can configure this target range to automatically change as well. While the target range is still selected, check the Auto box, and then click .

Now change the size of the source range, say by adding an extra row. First, select the source range.

![[Note]](images/note_1156523861.png)
An easy way to select a range is from the Bindings tab.
With the source range selected, click the new range icon
 .
.Enter the coordinates for the new range, click .
Click .

The target range should update as well.